Your download link is at the very bottom of the page... always.


Processed through Paypal
No account required.


Donate Bitcoin to this wallet:
1KkUMXvQ2ko3xcJkzitB7WYgoW6m79WFfm
Donate Ethereum to this wallet:
0x40E56922F43637224935CDC35e2c96E0392A8505
Donate Litecoin to this wallet:
LLYAFEyqjH69gkyCEpRjXNyedRCWrVChfL

Buy our over-priced crap to help keep things running.
Take No CrapwareOG Dad CapNo Password


Join our Facebook groupFollow us on TwitterFollow us on InstagramOur RSS FeedJoin us on TikTokJoin us on LinkedIn


 Home » OlderGeeks.com Freeware Downloads » Admin, System Administrator Tools » User Management » Quick User Manager v1.9.0.0   
File - Download Quick User Manager v1.9.0.0
Description

Always scroll to the bottom of the page for the main download link.
We don't believe in fake/misleading download buttons and tricks. The link is always in the same place.


Quick User Manager v1.9.0.0

A portable tool, featuring all user account management options in a simple, intuitive interface.

You are able to change user account settings, such as disabling/enabling the account, clear the lockout state, auto-logon a user, and remove user accounts from the welcome screen.

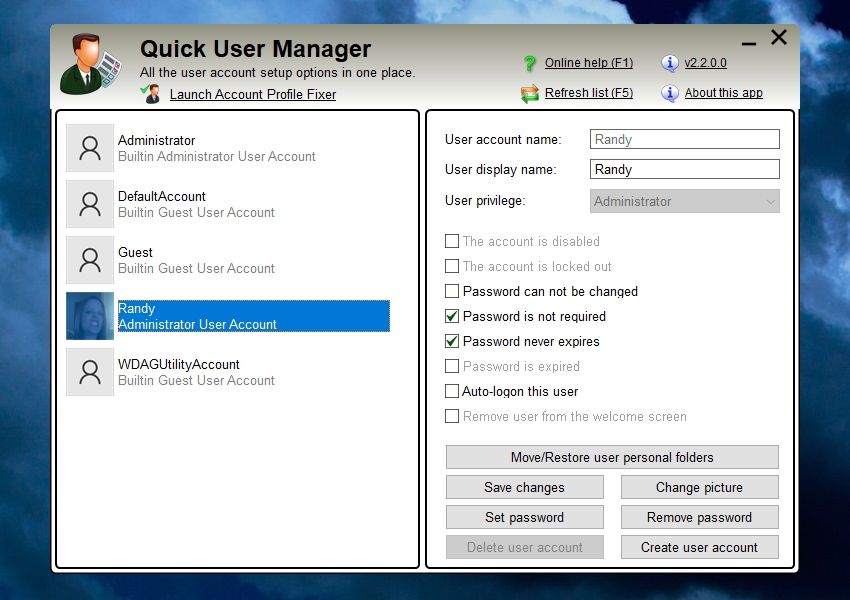
You can also set the picture associated with a user account, set or remove its password, delete and create user accounts. The latest versions of this tool also include Account Profile Fixer, which helps you to repair issues on broken user accounts.

The latest version of this application also includes our Account Profile Fixer tool, which allows you to easily repair a corrupted user account.

Quick user manager was built with simplicity and ease of use in mind. All the features are shown in the main interface, so you can perform the desired changes with just a few clicks.


Changing the location of the account's known folders

This feature allows you to change the location of some of some of your personal folders, and also restore their default location. To access this feature, select the account of the currently logeed in user, and then press Move/Restore user personal folders. This will display a dialog box similar to the one in the picture below.


You can change the location of the following folders: Desktop, Documents, Downloads, Music, Pictures and Video. The list shows the current and default location of those folders.

Before moving or restoring any folder path, youu should set the extra options, in the lower pane:

Also move folder contents: When this option is enabled, any existing files in the current location will be moved to the new location. If the new location is in a different volume, files will be copied instead, and then, on successful copy, deleted from the source.

Overwrite existing files. This option is only relevant if Also move folder contents is checked. This option controls whether the application should overwrite existing files, when moving them from the current location into the new one.

Select the folder you want to move/restore from the list. To move it to a new location, press Move selected. You will need to select the new folder location in the folder browsing dialog box that follows. To restore the folder's original location, press Restore default and confirm.

When you're done moving folders, simply close this dialog box by clicking the X at the top right corner.


Modifying a user account

To change a user account's settings, select the desired account in the list (left pane), set the desired settings in the right page and press Save changes. You will be presented with a message box asking you for confirmation. Press Yes to confirm, or No to cancel.

Below is a description of each setting.

User account name: This field corresponds to the real account name, the one that was saved in the Security account manager (SAM). This field can not be changed. To change the user name displayed in the welcome screen and start menu, use the User display name field instead.

User display name: This field contains the user name that is displayed in the welcome screen, start menu and the User accounts control panel applet. It can be edited for all non built-in user accounts.

User privilege: The privilege assigned to the user account. This setting is grayed out for built-in accounts, and for the current user, in order to prevent removing all the administrator accounts. Available settings are Guest, Standard user and Administrator.

The account is disabled: Whether to disable the selected user account. This setting is grayed out for built-in accounts, and for the current user, in order to prevent disabling all the administrator accounts. Disabled user accounts can not login.

The account is locked out: This setting is checked if a user account is locked out. You can not lock out an account, but you can unlock a previously locked one.

Password can not be changed: Whether this user can change its own password or not.

Password is not required: Whether a password is not required to impersonate this user. We recommend unchecking this option for normal user accounts.

Password never expires: Whether the password for this user has an expiry date and time.

Password is expired: This setting is checked if the password for the selected user is expired. You can not set this flag, but you can unset it if it has previously been set.

Auto-logon this user: Automatically log this user on when the computer boots up. Only one user can be automatically logged on. You will be promped to enter the auto-logon password for this user account. The password will be securelly saved as an LSA secret, just like the advanced users manager (control userpasswords2) does.

Remove this user from the welcome screen: If you check this option, the selected user account will be removed from the welcome screen, and will not be able to login interactively. Un-check it again to restore the user's visibility and login ability.

After you select the desired settings, you need to press Save changes to apply them, and confirm. If you're setting up the auto-logon, you'll have to enter a password, which must correspond to the password currently assigned to the selected user account. Can be an empty password.

A message box will tell you whether the selected settings were successfully applied, and the fields will be updated to reflect the changes made.


Changing a user account's picture

If you want to change the picture associated with the selected user account, press the Change picture button. You will be presented with a dialog box similar to the screenshot below.


Press the Browse button to select a new image using the Windows Shell.

Because the source image may not be squared, you can use the Center, Crop and Stretch radio buttons to adjust the way the picture is resized to fill the user tile's square. The preview picture will be updated to reflect the selected option.

To restore the original image in the preview picture, press Default.

Press Change picture to associate the selected picture to the user account.

Or press Cancel to keep using the current picture.

Note: This feature may not work properly on Windows 8/8.1, because changing the user tile is only available for Microsoft accounts. Quick user manager successfully changes the user tile, but it is not displayed in the Start/Welcome screen. You don't have any option to set the user tile's picture in the User accounts control panel applet either. Let's hope the new Windows 10 will remove this limitation.


Setting a user account's password

Quick user manager allows you to easily change the password for any user account. Just press the Set password button. You'll be presented with a dialog box similar to the screenshot below.


Enter the current password for the selected user in the Current password (if any): field, or leave this field blank if the selected account does not have any password set.

Enter the new password in the Enter new password: field, or leave this field blank if you want to remove the password for this user account.

Enter the same new password in the New password (again): field.

Press the Apply button to apply the new password.

Or press the Cancel button to keep using the current password.


Removing a user account's password

Important: This feature is provided only for administrators to be able to recover user accounts whose passwords have been lost. If you use this feature, any EFS encryped files, personal certificates and stored passwords for the selected account will be lost. You should always use the Set password feature instead, unless you do not know the user account's password.

To remove a user account's password, press the Remove password button, and confirm by pressing Yes, in the confirmation dialog box.


Deleting a user account

If you want to remove a user account, select the user you want to delete in the list and press Delete user account. You will be presented with a dialog box similar to the one in the picture below.


Note: After removing a user account, you will no longer be able to login using the deleted user account. Please consider creating a registry backup and a user profile backup before using this feature.

Check Also delete user files and folders if you want to permanently remove all the files in the user's profile directory and also the profile directory itself. If you do not check this option, the user account will be deleted but the associated files will remain in the hard drive. Note that you can disable the user account instead.

Press the Delete account button to start removing the user account.

Or press the Cancel button to cancel the removal operation.


Creating a new user account

Quick user manager provides you with a straight way of creating a user account, setting its password and picture simmultaneously. Just press the Create user account button. You'll be presented with a dialog box similar to the one in the screenshot below.


Enter the desired user name in the Account name field. User names can not have any of the following characters: "/ \ [ ] : | < > + = ; ? *,
User account names also can not end up with a period. If you need to use one of those charactes in the account name, you will be able to set them in the User display name field of the main Quick user manager's interface.

You can optionally set the password for the new user account in the Password (optional), and Password again (optional) fields.

You can also set the picture associated with the new user account using the controls in the User picture group. For more info on how to use those controls, see Changing a user account's picture.

When ready, press the Create account button to start creating your new user account.

Or press the Cancel button to cancel the user creation operation.


Top pane options

Press the Online help (F1) link whenever you want to come back to this help page.

Press the Refresh list (F5) link to update the users list.

Press the About this app link to open a dialog box containing extra info about Quick user manager.


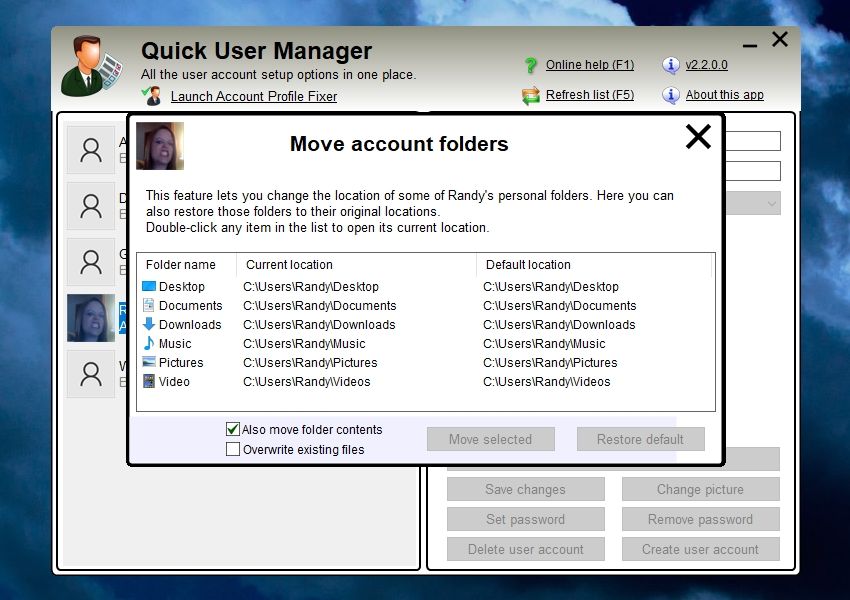
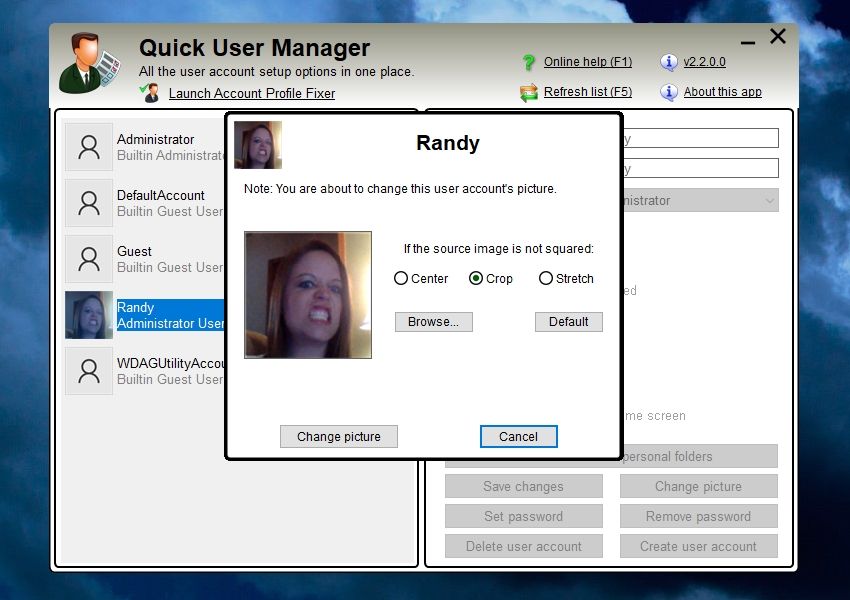
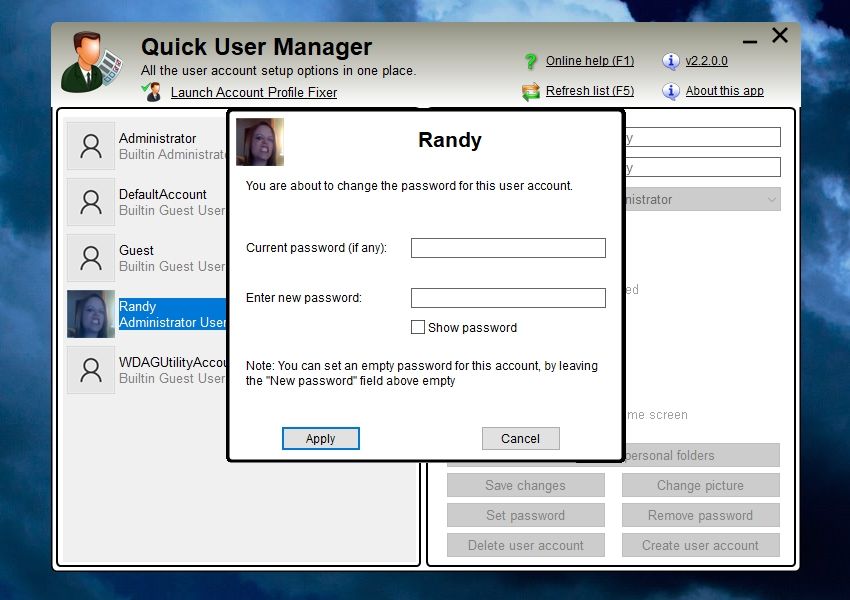
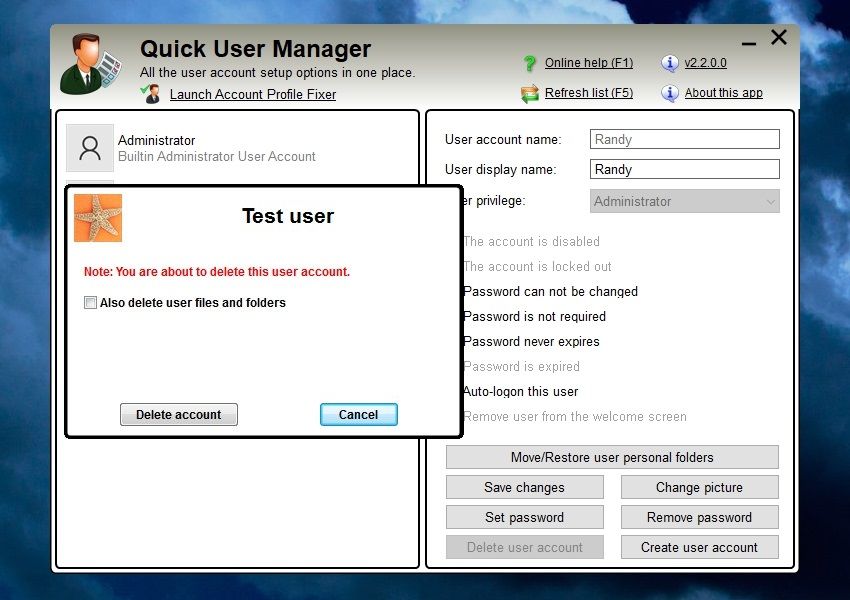
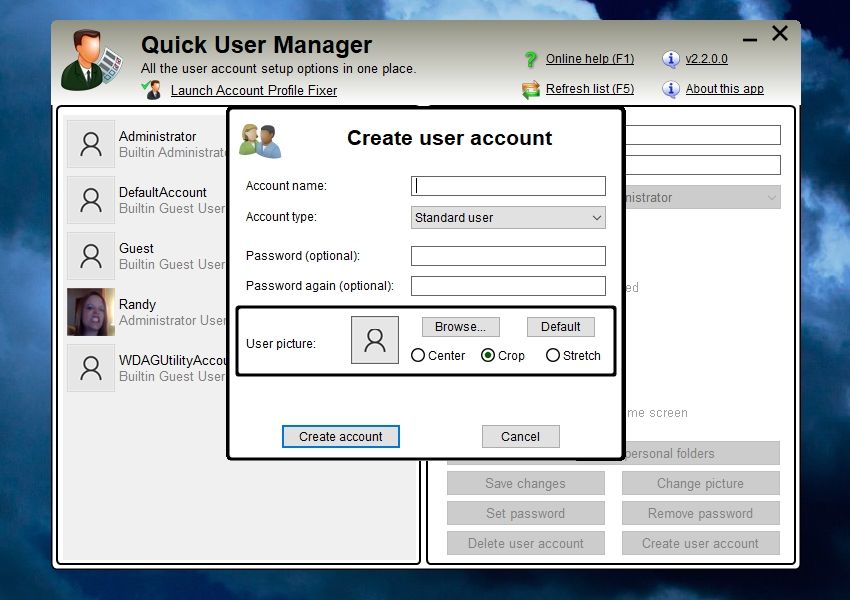
Click here to visit the author's website.
Continue below for the main download link.


Downloads Views Developer Last Update Version Size Type Rank
2,237 3,242 Carifred <img src="https://www.oldergeeks.com/downloads/gallery/thumbs/QuickUserManager1_th.png"border="0"> Aug 23, 2021 - 12:06 1.9.0.0 719.1KB EXE 5/5, out of 14 Votes.
File Tags
User  Quick  Manager  v1.9.0.0  
      
Whoa! Slow down there, Speedy.
Kindly read this and then continue to download below.

Like seeing no ads? No misleading/fake download buttons?
We like it too! This site has been kept alive for 15 years
because of people just like you who download and donate.
No one is stopping you from downloading without donating
but the site runs on the "Honor System". If your momma
raised you to be honorable, make a donation and download
'til ya turn blue. Make your momma proud!

Thank you! -Randy & Deanna (The Older Geeks)
Missouri Ozarks, USA

Monthly operating costs = $750
Donations cover operating costs first
then are set aside for future upgrades and/or
handed-over to Deanna for new shoes.

Or

Or
Send a check payable to Home Computer Repair LLC, 208 E. Water St. Mount Vernon, MO 65712


Recent Super Donors ($50+)
Thanks, Mark
Thanks, Michael
Thanks, Russell
Thanks, Home Business Services Inc

Recent Donors
Thanks, Stephen
Thanks, Suzanne
Thanks, Art
Thanks, Paul
Thanks, Graham
Thanks, Ruschmann & Scherling LLC
Thanks, Antonia
Thanks, Michael
Thanks, Douglas
Thanks, Tery

→ Download Your File ←


Click to Rate File     Share it on Twitter →


OlderGeeks.com Copyright (c) 2024