 |
JumpListsView v1.16
JumpListsView v1.16
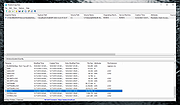
JumpListsView is a simple tool that displays the information stored by the 'Jump Lists' feature of Windows 7 and Windows 8. For every record found in the Jump Lists, the following information is displayed: The filename that the user opened, the date/time of the file opening event, the ID of the application that was used to open the file, the size/time/attributes of the file on the time that the file was opened, and more...
You can also export the Jump Lists records to csv/tab-delimited/xml/html file.
System Requirements
This utility works on Windows 7, Windows 8, and Windows 10. Both 32-bit and 64-bit systems are supported. On previous version of Windows, the 'Jump Lists' feature doesn't exist, and thus JumpListsView won't display any data, but... You can still read data from external hard-drive containing installation of Windows 7/8 by using the 'Advanced Options' window.
Jump Lists Folders
The jump lists information is stored under the following folders:
C:\Users\[User Profile]\AppData\Roaming\Microsoft\Windows\Recent\AutomaticDestinations
C:\Users\[User Profile]\AppData\Roaming\Microsoft\Windows\Recent\CustomDestinations
Currently, JumpListsView only reads the information from the AutomaticDestinations folder.
Changes:
UPDATED 03/26 Patch My PC Updater 4.0.1.4- Scans for outdated programs & patches them.
Start Using JumpListsView
JumpListsView doesn't require any installation process or additional dll files. In order to start using it, simply run the executable file - JumpListsView.exe
After running JumpListsView.exe, it scans the jump lists on your system and displays the information on the main window. You can select one or more items, and then export them to xml/html/csv/tab-delimited file. You can also copy the selected items to the clipboard (CTRL+C) and the paste the data into Excel or other spreadsheet application.
JumpListsView Columns
Filename and Full Path: The filename that the user probably opened.
Record Time: Specifies the date/time that the user probably opened the specified filename.
Created Time, Modified Time, ... |
 |
5,342 |
Sep 14, 2019
Nir Sofer  |
 |
NetworkConnectLog v1.16
NetworkConnectLog v1.16
Repeatedly scans your local area network and logs computers /devices as they connect or disconnects from network.
NetworkConnectLog is a simple utility that repeatedly scans your local area network (Using ARP and Netbios protocols) and add a new log line every time that a new computer or device connects to your network, and when a computer or device disconnects from your network.
After the connect/disconnect log lines are accumulated, you can easily export the log lines to comma-delimited/tab-delimited/html/xml file.
System Requirements
This utility works on any version of Windows, starting from Windows 2000 and up to Windows 11. Both 32-bit and 64-bit systems are supported.
Known Issues
In some circumstances, Smartphone devices don't respond to ARP requests, even when the device shows that it's actually connected to the network. In this situation, NetworkConnectLog will show that the device is disconnected.
Changes:
v1.16:
Fixed to display a check mark when the 'Put Icon On Tray' option is turned on.
Start Using NetworkConnectLog
NetworkConnectLog doesn't require any installation process or additional dll files. In order to start using it, simply run the executable file - NetworkConnectLog.exe
After you run NetworkConnectLog.exe, it immediately starts to scan your network. The first scan is fast, in order to detect all computers and devices that are currently connected to your network. After the first scan, NetworkConnectLog repeatedly scans your network in lower speeds in order to check if computer/devices connected or disconnected to your network. Every time that NetworkConnectLog detects that computer or device connected or disconnected to your network, a new log line is added.
If from some reason NetworkConnectLog fails to detect your network properly, you should go to the 'Scan Options' window (F9) and choose the correct network adapter or IP addresses range ... |
 |
6,340 |
Feb 20, 2024
Nir Sofer  |
 |
ShadowCopyView v1.16
ShadowCopyView v1.16
A free, simple tool for Windows 10/8/7/Vista that lists the snapshots of your hard drive created by the 'Volume Shadow Copy' service of Windows. Every snapshot contains an older versions of your files and folders from the date that the snapshot was created, you can browse the older version of your files and folders, and optionally copy them into a folder on your disk.
ShadowCopyView vs 'Previous Versions' feature of Windows
Windows operating system allows you to access the 'Shadow Copies' by right-clicking on the file/folder/drive, choosing 'Properties' and then 'Previous Versions'. However, this feature might omit some of the shadow copies. ShadowCopyView displays all of them.
Also, the 'Previous Versions' window doesn't allow you to access copy system files unless UAC (User Account Control) is turned off. ShadowCopyView is executed with full admin rights (elevated process), so you can access and extract any file you need.
System Requirements
This utility works on any version of Windows, starting from Windows Vista, and up to Windows 10. Windows XP is not supported. In order to use ShadowCopyView on 64-bit systems, you must download and use the 64-bit version of this tool.
Start Using ShadowCopyView
ShadowCopyView doesn't require any installation process or additional DLL files. In order to start using it, simply run the executable file - ShadowCopyView.exe
After running ShadowCopyView, the upper pane of the main window displays the list of all snapshots created by the Volume Shadow Copy service of Windows. When selecting a snapshot in the upper pane, the lower pane displays the files and folder of the selected snapshot. You can navigate to a subfolder by double-clicking a folder or pressing the enter key. You can return back to the previous folders by using the 'Directory Level Up' (Alt+Up Arrow) option or 'Go To Root Directory' option (Ctrl+R).
You can also navigate ... |
 |
5,993 |
Dec 29, 2023
Nir Sofer  |
 |
SimpleCodeGenerator v1.16
SimpleCodeGenerator v1.16
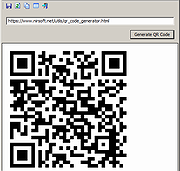
A simple tool for Windows that allows you to quickly generate QR Code for scanning with App on your Smartphone.
You can display the QR Code on the screen, copy it to the clipboard and then paste it to another program (as image), or save it image file - .png , .gif , .jpg , .tiff, or .bmp
SimpleCodeGenerator also allows you to generate QR Code from command line and save it as image file ( .png , .gif , .jpg , .tiff, or .bmp) without displaying any user interface.
System Requirements
This tool works on any version of Windows, starting from Windows XP and up to Windows 11. Both 32-bit and 64-bit systems are supported.
This tool is just a small standalone .exe file (Less than 100KB !) that you can run on any system without installing anything.
Versions History
Version 1.16
Added /ShowFromFile and /SaveFromFile command-line options, which allow you to load the QR Code from a file.
What you can do with QR Codes
With this tool, you can create QR Codes that open a URL on the Web browser of your Smartphone, add a new contact to your Smartphone, add new Wi-Fi network to your Smartphone, open map in the specified latitude/longitude, and more.
You simply have to type the correct QR Code string in SimpleCodeGenerator, generate the QR Code, and then scan it with QR Code reader App on your Smartphone.
You can read this article to learn how to compose the QR Code string that will do what you need.
Start Using SimpleCodeGenerator
SimpleCodeGenerator doesn't require any installation process or additional DLL files. In order to start using it, simply run the executable file - SimpleCodeGenerator.exe
After running SimpleCodeGenerator, you can type the URL or ... |
 |
1,979 |
Oct 18, 2024
Nir Sofer  |
 |
SimpleProgramDebugger v1.16
SimpleProgramDebugger v1.16
A simple debugging tool for Windows that attaches to existing running program or starts a new program in debugging mode, and then displays all major debugging events occurs while the program is running, including Exception, Create Thread, Create Process, Exit Thread, Exit Process, Load DLL, Unload Dll, and Debug String.
After the debugging events are accumulated, you can easily export them into comma-delimited/tab-delimited/xml/html file or copy them to the clipboard and then paste them into Excel or any other spreadsheet application.
System Requirements
This utility works on any version of Windows, starting from Windows XP and up to Windows 11. Both 32-bit and 64-bit systems are supported.
Changes:
Version 1.16:
Added 'Add Header Line To CSV/Tab-Delimited File' option (Turned on by default).
Fixed a few high DPI mode issues.
Fixed a bug that caused a small token handles leak (In the 'Select Process' window).
Start Using SimpleProgramDebugger
SimpleProgramDebugger doesn't require any installation process or additional dll files. In order to start using it, simply run the executable file - SimpleProgramDebugger.exe
After running SimpleProgramDebugger, you can attach a program that is already running by pressing F7 and choosing the desired process, or you can start a new program by pressing Ctrl+N and choosing the .exe file to run, and optionally parameters and start folder.
After the debugging events are displayed in the main window of SimpleProgramDebugger, you can select one or more events, and then use the 'Save Selected items' option to export them into comma-delimited/tab-delimited/xml/html file or press Ctrl+C to copy them to the clipboard, and then paste them into Excel or any other spreadsheet application.
Command-Line Options
/DebugProcess <Process ID/Filename> Start to debug an existing process. You can specify the process ID or process filename, for example:
SimpleProgramDebugger.exe /DebugProcess explorer.exe
SimpleProgramDebugger.exe /DebugProcess "c:\temp\myexe.exe"
SimpleProgramDebugger.exe /DebugProcess 4522
/StartDebugProcess Start ... |
 |
9,061 |
Sep 20, 2022
Nir Sofer  |
 |
USBFlashCopy v1.16
USBFlashCopy v1.16
USBFlashCopy is a small Windows utility to back up your flash drives and storage cards on the fly. It runs in the background and copies files from inserted media to a safe location on your hard drive.
USBFlashCopy is free for non-commercial use.
Nothing to install
Simply download and run. No installation, no registry entries.
Small
USBFlashCopy is a really small utility taking no more than 300KB of space, it doesn't require additional libraries, frameworks or anything else to download and install.
Portable
Run USBFlashCopy from any folder or drive.
Simple and clever
USBFlashCopy automatically detects when you insert a media and copies its content to a safe location. By default, it creates a sub-folder for each removable media in "My Documents\Removable Media Backups".
Supports Profiles
Create profiles with separate settings for different flash sticks or storage cards. You can change default settings for new or rarely used medias.
Copies newer files only
USBFlashCopy copies only newer or updated files, you can optionally keep old versions of the files.
Move your settings
USBFlashCopy keeps its settings in an INI file, automatically created in the folder it is running from. Copy USBFlashCopy.ini along with executable to keep your settings.
System requirements
USBFlashCopy can be used almost on any PC that has 1 MB of free hard drive space and is running Microsoft Windows 2000/XP/Vista/7/8/10 32/64 bit.
Click here to visit the author's website. |
 |
4,814 |
Dec 16, 2020
Imposant  |


